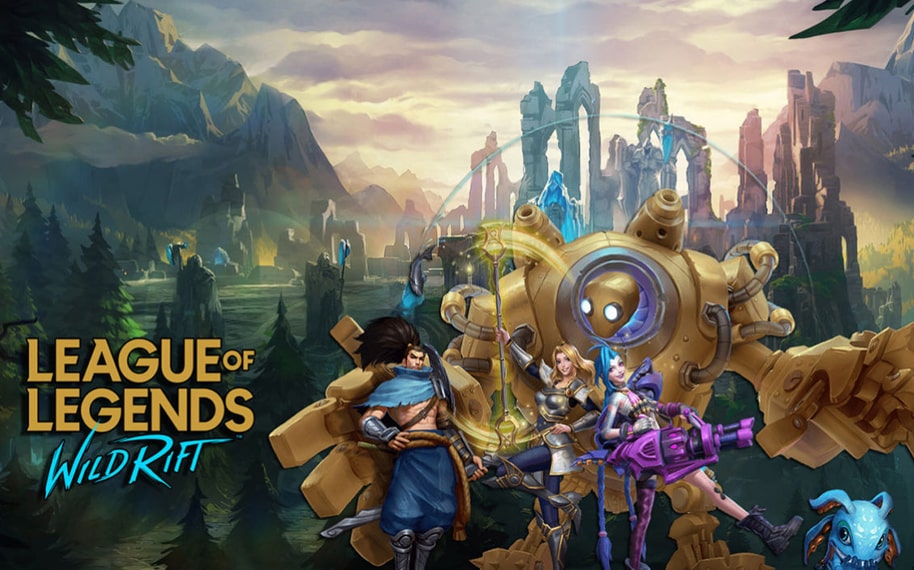
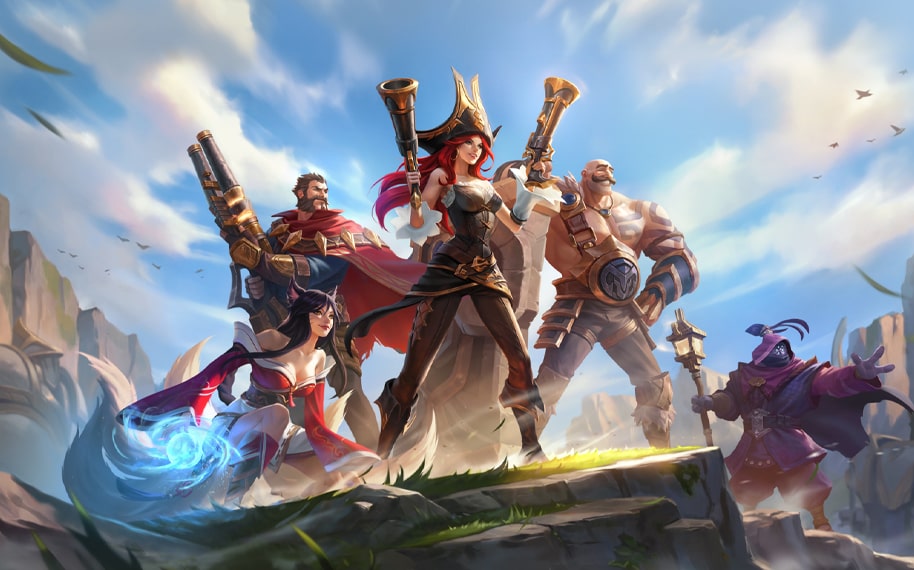
Introduction
League of Legends: Wild Rift (LOL: Wild Rift) is the mobile version of the hugely popular PC game of the same name, League of Legends (LOL). A Multiplayer Online Battle Arena (MOBA) game, players compete with others on a 5v5 arena-like map by choosing exclusive in-game Champions (hero characters) to represent each other.
Champions are assigned into two (2) teams of five (5) players each, before battling it out on the infamous ‘Summoner’s Rift’ map, which has been reworked to adopt for better hand-held gaming experiences. The aim of each match is to destroy the opposing team’s Nexus (base building), which will be guarded by the associated players, small minions, and turrets scattered along each main ‘lanes’ (pathways) around the map.
The first team to destroy the other’s Nexus wins the match, so expect awesome team fights and ‘gank’ manoeuvres (attacking from the flanks) between each group of Champions as they level up the longer the match ensues.
Beginner’s Guide
Champions
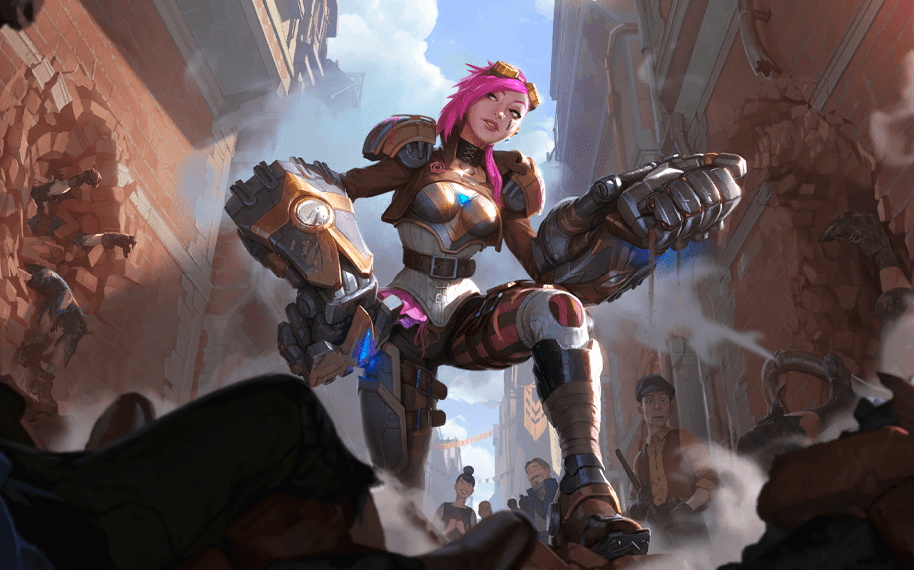
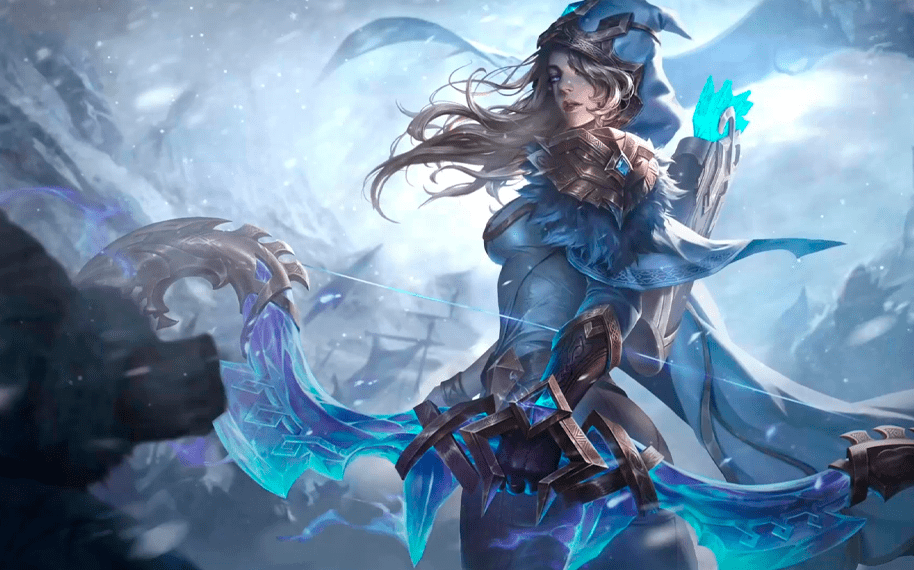
Before the start of every match, you will be allowed to choose one ‘Hero’ character to play as, against the opposing team. These Heroes are aptly named Champions in LOL: Wild Rift, and they are the main lifeblood towards victory in every game.
Currently, there are more than sixty (60) in-game Champions to choose from, with the roster continuously updated to slowly rival the original game’s one hundred fifty (150) plus characters. Each Champion has their distinct playstyles, abilities, item builds and Rune setups for you to learn, in order to maximize their winning potential throughout a match.
To note, LOL: Wild Rift practices a weekly Champion rotation system which allows you to test out different Champions before settling on your favourites. If you are already familiar with some of the Champions though, you are also able to purchase them permanently via Blue Motes or Wild Cores (in-game currencies).
Journey to Victory
In LOL: Wild Rift, there are two (2) direct ways of obtaining the victory against the opposing Champions. These are:
Destroying the enemies’ main Nexus.
Forfeiture of the opposing team (surrender)
The enemies rarely surrender during a match (usually only happens during the end-game, if you are already close to winning). Due to this, it is more advisable for you to focus on destroying the enemy Nexus instead, levelling up your Champion while assisting the team in racking up the kills too.
The road to victory is not always easy, as you will need to coordinate with teammates effectively to slowly advance against the enemies’ continuous waves of minions, stationery turrets and their own Champions around the map.
Minions
Both teams spawn endless waves of minions (AI-controlled units) continuously every 30 seconds of a game. They comprise of four (4) different types, depending on the in-game situation/ progress:
Melee minions: Close-range support units which continue to push forward in each lane.
Caster minions: Medium-ranged support units which use projectiles to attack foes.
Siege minions: Artillery units which provide extra damage against enemy turrets.
Super minions: Upgraded minions which only spawn in a specific lane where an enemy Inhibitor Turret (last turret guarding the base) is destroyed.
Minions not only benefit your team in terms of constantly pushing the lanes, but also simultaneously defending your team’s turrets and base from incoming enemy attacks as well. Additionally, one of the ways for players to ‘farm’ gold (for buying gears and items during a match) is by getting the killing blow on an enemy minion, which promotes players to focus on leading minion waves early on throughout a match.
Turrets
Besides minions, both teams will also have turrets scattered all over the three (3) lanes in Summoner’s Rift. Generally, there are nine (9) total turrets (excluding the Nexus and Nexus Obelisk, which also attack enemy players similarly to turrets) in place, with each lane provided with three (3) turrets to defend from enemy minion waves and Champion assaults. They are usually summarized as:
Tier 1 Turrets (the furthest turret from the Nexus, in each lane)
Tier 2 Turrets (the middle turret in each lane)
Inhibitor Turrets (the final defensive turret in a lane)
Bear in mind that players can gain bonus gold income by assisting to destroy a turret (while standing within the turret’s circle of range), providing incentives for you to always push towards engaging the enemy’s turrets constantly. However, turrets pose a very dangerous threat to Champions, especially during the first five (5) levels throughout a match.
Fountain
Your place of healing, the Fountain is where you return to replenish all your lost Health and Mana (magical resource for Intelligence-based Champions). Note that Champions who use other attacking resources like Energy and Fury (instead of Mana) will not regenerate them at a Fountain, as their playing style is unique depending on the characters and their mechanics.
The Fountain is also your spawning location during a match; your Champions start off here at the beginning of each game, and respawn after being killed during combat. If you are injured halfway across the entire map, you will be able to teleport back to the Fountain by pressing the ‘Recall’ ability positioned in the lower middle screen of your in-game HUD (represented by a blue beaming icon).
‘Recall’ channels your Champion to be teleported instantly to the Fountain, but this will leave your character vulnerable to attacks and status effects (stun, paralyze, etc.) if you are caught off-guard. Always be sure to check your surroundings, or hide in the brush, before recalling back to base to resupply or heal.
Finally, Fountains on both teams are guarded by a Nexus Obelisk – also considered as the ‘Fountain turret’ – which aims to deter enemy ‘camping’ (sitting nearby the spawning location to quickly kill respawning Champions), with the Obelisk potentially possessing the highest base Damage-per-Second (DPS) output in the game.
Item Shop and Currency
Items are the equipment which boost or supplement your Champions’ abilities during a game, and will prove to be the decisive factor for your team’s next win, or impending loss. You will be able to hold up to six (6) items only, at any given point throughout a match. This ensures that no player is given an unfair advantage during a game, and that item planning and build orders become another primary aspect of Champion-play too.
Each item is priced at different gold amounts for you to purchase, with better gear usually bought off by purchasing their smaller item requirements first. In LOL: Wild Rift, there are six (6) different categories of items:
Basic: the simplest form of items which improves stats like damage, health, mana, etc.
Mid-tier (Intermediate): items which require a quick combination of basic items to create, providing minor stat increases, active skills, or passive buffs to allies/ debuffs to enemies.
Upgraded: a combination of different mid-tier items (depending on the item recipe), these powerful end-game items provide significant stat boosts, passive buffs and active skills to use against Enemy Champions and their forces.
Boots: these items are movement enhancers, improving your Champion’s movement speed besides providing any other potential benefits (damage, magic, attack speed, etc.), depending on the type of boot acquired.
Enchantments: specifically restricted to Boots, Enchantments allow you to upgrade your Boot items further (once) into various upgraded forms, which usually provides an extra active skill for your Champion to use, besides other passive benefits as well (depending on the item).
Trinkets: non-combat items, these are considered utility items which provide other potential use in the game (map vision, etc.), and do not need to be bought (can be changed on the fly by visiting the fountain).
In LOL: Wild Rift, you will only be able to buy items at the Item Shop located in the Fountain area, meaning that you will have to return every so often (abuse the Recall ability) to constantly buy new items and upgrade existing ones during a game.
Items can only be bought via in-game Gold, which is collected throughout a match by killing monsters, enemy minions and Champions, destroying turrets, or assisting your teammates to kill other Champions too.
Understanding The Champions
Unique Characters
Champions are the heroes whom you choose to play as, in every game of LOL: Wild Rift. With a current roster of more than sixty (60) Champions to decide from, there are countless possible playstyles and tactics for you to master, in order to become proficient with each of them. LOL: Wild Rift utilizes the same hero concept as any other MOBA games out there, with each Champion falling under the different battlefield roles as explained below:
Fighter: a strong Champion who is capable of taking hits while also dishing out respectable amounts of damage to enemies at the same time, they usually take the battle to the enemy, leading from the frontlines.
Mage: spell-casters who are proficient in creating destructive magical attacks besides providing beneficial boons to teammates too, they are often times capable of killing multiple enemies at once due to the majority of Area-of-Effect (AOE) attacks at their disposal.
Assassin: the damage-dealing player of the team, Assassins are Champions who excel in finishing off Enemy Champions after a team fight, and can become very frightening oppositions once they are considered ‘fat’ (nearly maxed out in terms of level and top-tier items).
Marksman: Ranged Champions who harass other opposition Champions while pushing through lanes to pile on the pressure against enemy turrets and oncoming Champion rushes, they are very susceptible to damage, but provide tremendous DPS on the other end of the spectrum.
Tank: Tanks are the guardians of the team, redirecting most of the enemy attacks towards them while letting their teammates focus on the offensive. Although tanks are not generally known for their impressive DPS, they are still capable of finishing off Enemy Champions through their abilities while also being able to sustain themselves for longer, during fights.
Support: Support Champions are a diverse range of characters which prioritize team benefits over individual prowess. Some Support Champions exclusively favour team setups to provide the best chance of defeating groups of enemies, like Soraka (Champion) who is excellent at providing last-minute healing effects to herself and teammates during crucial moments.
Although most Champions tend to stick to their specific team roles to ensure the highest possible success of winning, you are also able to diverge from their pre-determined builds by experimenting with different item setups, making them unpredictable during fights.
However, this is most definitely advised for training sessions or casual Normal matches for you to play around with things, and NOT for Ranked play. A slight difference between the Champions of LOL: Wild Rift and LOL on PC is that the maximum character level has now been decreased to accommodate quicker gameplay sessions for handheld players. The level differences are illustrated as below:
| GAME | MAXIMUM LEVEL | ‘ULTIMATE’ ABILITY RANK-UPS (at which level) |
| LOL: Wild Rift | 15 | 5/ 9/ 13 |
| LOL (PC) | 18 | 6/ 11/ 16 |
Knowing when to time your ability level-ups appropriately will definitely play a huge part between massacring your opponents’ Champions in the early game, or your Champions eating the dirt frequently up till mid-game.
Summoner Spells And Runes
Moving slightly apart from the Champions, you are also able to arm your heroes with Summoner Spells and Runes too.
Summoner Spells
Summarily, Summoner Spells are secondary skills which provide small gameplay boosts to aid your Champions, depending on the circumstances and your preferred playing style. Currently, the Summoner Spells which are available in LOL: Wild Rift are:
Barrier: creates a temporary shield around your Champion, absorbing damage for a short period of time.
Exhaust: reduces the movement speed and attack damage of an Enemy Champion for a short duration.
Flash: your Champion teleports a short distance forward (or towards your preferred direction).
Ghost: you receive a massive surge of movement speed for a brief duration.
Heal: restores a small amount of Health while providing a momentary boost to movement speed.
Ignite: inflicts periodic True Damage (ignoring Armour and Magic Resistance) for a short duration, while creating Grievous Wounds on an Enemy Champion.
Smite: deals massive True Damage to neutral creep/ monster or enemy minions, restoring a small amount of Health if using Smite as the killing blow.
Runes
Another component which boosts the lethality and competency of your in-game Champions are Runes too. Basically, Runes are additional modifiers which open up a different skill tree (only passive effects) for all Champions to share despite their distinct playing styles. This makes your Garen (Champion) very different from your friend’s Garen (assuming both opt for the same item builds) in different match-ups. Your Rune choices can also be varied and saved for each Champion too, allowing you to experiment with endless unique playing set pieces on the battlefield.
The possible Rune choices that you are able to make in the game are divided into two (2) components:
Keystones: Primary Rune elements (offers more discrete and powerful effects). Example: Electrocute, Aery, Conqueror, Fleet Footwork
Paths: Minor Rune component which provide slight in-game boosts and effects. Example: Domination, Resolve, Inspiration
Keystones are stronger Rune counterparts to Paths which provide a much bigger impact on your Champion’s playing styles. On the other hand, Paths are minor supplementary effects which contribute towards your preferred tactics and strategies, according to each Champion.
Exploring a plethora of different Rune combinations, as well as varied Item choices to strengthen your heroes, will definitely keep your opponents guessing on how to beat you in the game.
Mastering the Game Modes
At its core, LOL: Wild Rift is still a competitive PvP game, with which you team up with others to defeat the opposing team via wits, coordinated play and impeccable item builds. There are various different game modes for you to enjoy in the game, but the general concept of play is still a 5v5 team brawl, with each occupying opposite bases in a map. Whether you’re new to the game or just jumped ship from LOL on PC, here are some brief summaries about the different game modes currently available in LOL: Wild Rift.
Ranked
The first game mode which will be displayed on your LOL: Wild Rift home screen will be Ranked play, which automatically pits you against other players of the same skill level as you are. Similar to LOL on PC, there will be plenty of Ranked tiers for you to rank up. However, LOL: Wild Rift introduces a new Rank within the mix: Emerald tier. Here are the current Ranks that you will be able to progress in competitive play:
Iron
Bronze
Silver
Gold
Platinum
Emerald
Diamond
Master
Grandmaster
Challenger
Breaking each of the ranks further, each tier will also be divided into four (4) different Divisions too, with lower rank numbers meaning better overall skill level. For instance Tier Iron I (1) is higher ranked than Iron IV (4). This works similarly with all other Ranks except Master, Grandmaster and Challenger, which do not have Divisions as explained below.
Rank Marks & Fortitude
When ranking up from Iron IV to Diamond IV, each win earns you one (1) point of ‘Mark’. Marks are essentially indicators to determine your progress throughout the current Rank/ Division.
Fortitude is another system currently implemented to supplement lower-tier players’ progress until you reach Diamond IV (Fortitude is removed from then on). Fortitude works by accumulating points based on your individual performances or achievements throughout matches. Once you reach the maximum Fortitude points per tier, half of it is automatically consumed to award you with 1 Mark towards your Rank progress.
These two mechanics work in tandem with each other, to allow new players to develop into the game much easily.
Promotion & Demotion
LOL: Wild Rift utilizes both a promotion and relegation system for Ranked play. In LOL: Wild Rift, Rank Promotions will be available for you when you’ve achieved maximum Marks for the highest Division of a Rank (Iron 1, Bronze 1, Silver 1, etc.). Once achieved, you will be placed in a Promotional Series of matches, which will review your promotional credentials towards the next Rank. If you lose too many times, resulting in subsequent Mark losses, you may also suffer the risk of getting demoted to a lower Rank. However, this is only applicable to Rank Silver and above (Ranks Iron and Bronze are exempted from demotions).
Top Tier Ranks
Starting from rank Diamond and above, the Rank Mark system is replaced with Victory Points (VP) instead. VPs are essentially the combination of Rank Marks and Fortitudes combined; you gain a variable amount of VP based on your wins and match performances combined together.
The Ranked leagues (known as Top Tier Ranks) which use VPs to ascertain your standings are:
Diamond (IV to I)
Master
Grandmaster
Challenger
However, amongst the top four Rank tiers mentioned, only Diamond still practices Rank Divisions in order to Rank up, although the Mark system (points accumulated for winning) has been replaced with VPs instead.
Conclusively, the game will monitor your progress based on where your VP count stands amongst all players from Master to Challenger, and place you in the respective tier accordingly. One thing to note is that VPs do decay; prolonged inactivity from playing Ranked matches will slowly reduce your VP count if applicable.
If you have not been playing Ranked matches for a whole week (assuming you have a counter of 7 Ranked matches previously), then the next day of inactivity will start to reduce your VPs instead, lowering your overall score on the regional leaderboard and may lead to the worst scenario of all: demotion to a lower Rank.
Keep a steady Ranked match schedule per day, and this shouldn’t be a problem.
Normal
Outside of intense competitive play, you can actually enjoy some casual games in LOL: Wild Rift by opting for Normal matches instead. Currently under Normal matches, there are three sub-categories for you to choose from:
Player vs Player (PvP)
All Random All Mid, ARAM (limited time event)
Co-Op vs AI
PvP is self-explanatory; you will be placed under a randomized matchmaking queue to play with – and against others – online.
ARAM mode is also a PvP match, but the map will now be restricted to only the middle lane for you to push towards the enemy Nexus – all while having to play as randomly picked Champions too!
In Co-Op vs AI, you may decide to join others in playing against the computer or team up with the bots themselves.
Training
For beginners of LOL: Wild Rift, Training mode is probably the best place for you to start familiarizing yourself with the game’s basic mechanics, systems, and features. In Training, you will be prompted to choose between:
Tutorials
Practice
Tutorials will teach you all the minute details of LOL: Wild Rift, starting from the in-game commands to winning games by destroying the enemy Nexus. You will also learn about the importance of ‘jungling’ (grinding for Gold and Experience by killing Neutral mobs/ creatures around the map’s jungle areas), besides the various buffs that are available around the map.
In Practice, you are able to play as any Champion in the game, for you to have an understanding of each hero’s playing style, abilities and weaknesses (even those which you have not unlocked). Practice also provides you with in-game tools to play around with the settings, from disabling the Enemy Champion’s AI to toggling Invincibility (essentially God Mode) for your chosen Champion.
All in all, Training mode is the best place for you to explore new possibilities when booting up LOL: Wild Rift.
Custom
Custom Match is where you will be able to create your own private session to play with friends or the AI. Custom Matches will not play into your Ranked ratings, so you are free to try out new things in the game here. In Custom mode, you will decide between three (3) different options:
Blind Pick
Draft Pick
Howling Abyss
Blind Pick is the normal practice where every player on both teams decides on their preferred Champions on a first-come-first-serve basis.
Draft Pick is the current format which is also implemented for Ranked games; each player will have the opportunity to choose their Champions before another player gets their turn to do so.
Howling Abyss is your own customizable ARAM experience, where you can set certain in-game settings and party up with friends for a more casual experience.
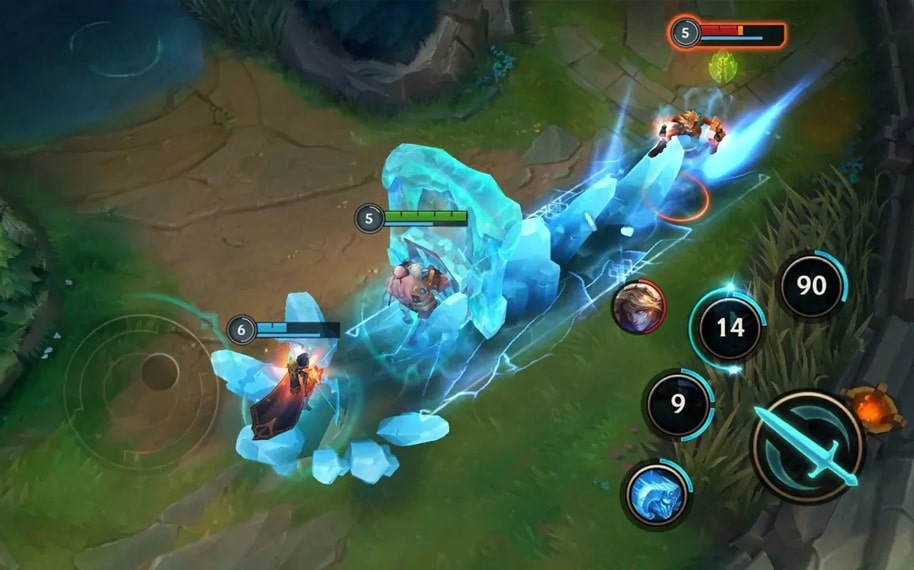
Exploiting the Map
In LOL: Wild Rift, the only map currently available for play is the exclusively popular ‘Summoner’s Rift’.Al so dubbed ‘Fields of Justice’, maps play crucial aspects of team setups no matter what game mode you play. Occasionally, your team can also be placed on the top-right base of the map, automatically rotating both your map layout and the mini-map to accommodate the change (Baron lane and Dragon lane are swapped). Understanding where everything is located throughout a match will play directly towards you winning or losing a game.
The Different Lanes
As mentioned earlier in the guide, there are three (3) main lanes for players to use as the focal points of attacking the opposing team. Minions that are spawned by both teams will only travel through these three routes towards the opponents’ Nexus, no matter what comes in their way (even if other Champions try to lure them towards other parts of the map). Controlling these lanes consistently by destroying the enemy turrets blocking your minions’ path is pivotal towards winning a match. LOL: Wild Rift practices the same lane elements which are already familiar in other MOBA games, but with its own unique twist:
Top lane (Top) = Baron lane/ Dragon lane (depending on team position)
Middle lane (Mid) = Middle lane
Bottom lane (Bot) = Dragon lane/ Baron lane (depending on team position)
The general terminologies (Top, Mid, Bot) still apply in-game, but you will no longer be confused when teammates start to use the new lane terms (Baron, Mid, Dragon) to communicate with you.
Every Champion is viable to play on any side of the map, but in order to maximize your team’s chances of success, understanding which Champion excels in which lane can become the difference between winning and losing.
Pathing the Terrain
Although the in-game terrain provides no ‘organic’ benefits to gameplay, there are certain aspects of the environment which do factor towards ambushing the enemy team. These can vary between providing invaluable vision to map control, so be sure to keep these things in mind all the time on the battlefield:
Brush (other terms: grass/ thickets)
A universal stealth mechanic in almost all MOBA games to date, these small thickets are a common theme for players to use while ganking, retreating and ambushing other players during a game. When you enter into a brush spot, your Champion becomes hidden amongst the grass, removing your location on the mini-map (to enemies) unless spotted again. You can only reveal a Champion hidden in a bush through:
Entering the same brush area which hides the Champion
Items such as Wards (providing sight at designated locations)
Champion abilities which provide sight
Understanding these aspects of using the grass to your advantage will open up plenty of potential team setups to outmanoeuvre your enemies around the Fields of Justice.
Jungle (other term: forest)
The large central area of the map surrounded by trees is the jungle, home to many of the neutral creeps/ monsters which become the main farming resource for jungling Champions. Some of these neutral monsters provide significant buffs for jungling Champions, with damage-dealing Champions usually going off the beaten path to obtain these effects to maximize their in-game potency. You can also ambush unwary enemies on the lanes by attacking unsuspecting Champions from their rear, with the jungle providing plenty of bushes to hide in. Certain plants are also placed in the jungle too, like the Blast Cone which knocks you up towards a certain location of your choice nearby.
Constantly having eyes inside the jungle areas will serve you immensely throughout every single match, directly contributing to the overall map control of your team.
River (other term: water, stream)
Cutting horizontally through the middle of Summoner’s Rift is a slow-moving, clear river which provides a straight-forward path between all the three lanes. The river is the best place to traverse from one side of the map towards the other, with which you can also find Epic-level creatures like Baron Nashor nestling peacefully by the sides, unless disturbed. Certain brush locations are also situated around the river, making it the ideal spot for players to transition from laning phases into ganking opportunities, and vice versa.
Fruits and Plants
Throughout ‘Summoner’s Rift’, there are currently three (3) special plant types which are scattered around the map, each offering a unique gameplay element to the game. In LOL: Wild Rift, these plants are known as:
Blast Cone: Knocks you a distance away, once hit. You can use this to your advantage in different scenarios during battle:
Creates distance between you and your pursuer if you are on the run.
Propels you forward to catch fleeing Enemy Champions.
Scryer’s Bloom. Creates a wave of pollen towards a specified direction, after getting hit. These pollen provides sight from the Fog of War (FOW), revealing anything within its path:
Can be used to uncover any hidden Enemy Champions in nearby brushes.
To spy on the Epic-monsters (usually Dragons or Baron) in order to steal buffs for the team, if the enemy is close to killing them.
Honeyfruit: A plant which holds health-replenishing fruits on its vines, hitting it will drop a few of its juicy fruits on the ground. These can be strategically used to restore a certain amount of your Champion’s health during emergency situations.
By knowing exactly where these plants are located around the battlefield, you will be able to utilize them effectively throughout many of LOL: Wild Rift’s adrenaline-packed team fights during competitive plays.
Killing Monsters
There are various monsters making their home around the map in LOL: Wild Rift. These neutral critters do not pose any threat to Champions and their forces, but a few of them possess invaluable buffs and team effects which may turn the tide of your battles ahead. These creatures will continue to respawn after being killed, barring a few notable exceptions.
All the other neutral monsters in the game can be killed for Gold and Experience, but the important creatures which your team would need to consistently kill for their buffs are:
Rift Scuttler (speed and vision): These creatures are timid and passive; they will not retaliate or attack back even if you attack them. They will periodically and randomly spawn at the river section, with which defeating them will force them to burrow and create a small cone of bonus movement speed and vision of the area for the whole team.
Red Brambleback (red buff): Slaying these creatures provide you with Slow and Burn effects which is applied on your attacks to Enemy Champions, making them more susceptible to takedowns.
Blue Sentinel (blue buff): These peaceful golems provide bonuses to Mana Regen and Health Regen for your Champion, making them essential for spell-based Assassins and Mages.
Dragons (evolves into Elder Dragons after all four basic types are killed): Dragons (also called Drakes) are elemental winged creatures which provide permanent team buffs throughout the whole match, making them a priority kill in almost every game. These Dragons spawn randomly between elements, each known as Mountain, Ocean, Cloud and Infernal Dragons respectively (each offering different team buffs). Once all four are killed, they will be replaced with upgraded versions known as Elder DragonS, providing improved buffs of the same nature which stack.
Rift Herald (siege support): These Epic monsters spawn before Baron Nashor, earlier in the game. Killing these creatures will allow you to spawn it later at any specific lane of your choice, helping your minions to push through the enemy’s defensive turrets due to the Rift Herald’s boosted attacks against the strong tower’s plating.
Baron Nashor (replaces Rift Herald in late game): The strongest monster on the map, Baron Nashor is a monstrosity which typically requires a full team of Champions to kill quickly. Once slain, all Champions on your team will receive the Hand of Baron buff, providing both offensive and defensive bonuses to nearby minions. Furthermore, the whole team will also benefit from reduced Recall times and increased Attack Damage (AD) and Ability Power (AP).
Understanding the buffs that each of these beautiful monsters provide will tremendously swing the match tide to your advantage, so always be diligent with your team to claim these buffs as consistently as you can!
Tips & Tricks
In LOL: Wild Rift, skill and experience are what distinguishes the best from the rest. Top-level players from all over the world dedicate their time and effort to learning plenty of in-game exploits which can gain them the win much more easily. If you are eager to know a few notable strategies to outplay your opponent’s in LOL: Wild Rift, here are some incredible Tips and Tricks which can help you out no matter what Rank you’re currently playing in.
Know Thy Self
There are multitudes of Champions for you to choose from, each with their own respective team roles, mechanics and playing styles for you to master. With so many options to opt for, you will also need to know which Champion type you coherently belong to. Your preferred playing style and understanding of the game dictate how you will affect any match-ups in LOL: Wild Rift, so start things out slowly by playing Custom or Normal matches first.
Are you a dependable Tank for the team, saving your allies time and time again? Enjoy torturing your enemies with abundant amounts of slows and stuns as a Mage? LOL: Wild Rift is a team game, so you will need to make sure your specific role is what truly fits you in the first place. There is nothing wrong with experimenting around your Champion builds and setups, but doing it in a Ranked match will disrupt the entire team’s synergy as a whole, affecting both you and your allies’ performances as a result.
Laning Phase
Once you have a favourite character to play as in LOL: Wild Rift, stick to their typical team roles for the whole team to build up on (Assassin, Tank, Mage, Fighter, etc.). The role of your Champion will influence where you need to be early on during the laning phase (farming for gold and experience, usually until level 5). In essence, there are around four (4) groups of Champion laning phases which you should learn to adapt to:
Baron lane: This lane is predominantly conquered by Fighters and Tanks due to their high defensive capabilities if ganked by Enemy Champions. Being a lone Champion can also help you to level up and farm gold much easier than Dragon lane which usually occupies two Champions at a time. You can also mix things up by playing a Marksman or Support in the top lane, but be wary of early-game rushes since these Champions are much more squishy and easier to kill (not advised unless agreed by the whole team).
Middle lane: Assassins or Mages usually take up the middle lane due to their high damage output, although Marksman can also get away with it too sometimes. The middle lane is arguably the shortest lane on the map, so you can easily level up quicker by being alone to farm while also retreating to your tower if ambushed. Once you’ve accumulated enough levels and items to attack, you will then be able to easily gank either side of the map to grab the kills against unsuspecting Enemy Champions.
Dragon lane: Support and Marksman are the Champions which typically fill up the Dragon lane, but you can also change that with a Tank and Mage combination too. Although farming can become a bit harder due to the shared enemy minions, it is always advisable to let the Marksman get the minion kills and Gold for them to reach their maximum DPS much more easily. If played properly, your Marksman can fulfil their role as the Attack-Damage-Carry (ADC) of the team, dishing out loads of damage from afar while also pushing against defensive turrets. Noting the Dragon buffs’ importance, your Support and Marksman are also here to provide instant assistance when a Jungler or middle Champion is ready to help out in killing the Dragons which spawn nearby.
Jungle: Junglers are Champions who possess great skills and abilities to ambush Enemy Champions, and have respectable amounts of Attack Damage (AD) at their disposal. Fighters and Assassins are the most suitable Champions to play as a Jungler, capable of surviving the weak monster attacks while levelling up in the early game. If you decide to jungle, your effective duties are map control, vision, enemy ganks, and securing buffs. The importance of all these cannot be further emphasized, as failing any of these opens up opportunities for the Enemy Champions to capitalize on, meaning that your responsibilities as a Jungle can sometimes win or lose a game in itself.
As you can see, each laning phase has its own distinct elements which come with it, so knowing your favourite Champions from the inside-out will help you to know where you should be early on to farm and level up.
Coordinate and Abuse the Wards and Lens
LOL: Wild Rift’s free use of the in-game Warding Totems and Sweeping Lens create a new dynamic to the game’s map control. Unlike other MOBAs, these Trinkets can freely be swapped at the Fountain, while their use is only limited to a number of cooldown timers instead of buying them with Gold. Depending on your team’s composition, each of you should know who is handling each item, to spread out the responsibilities around the map in order to gain full map control and vision.
Junglers, Fighters and Tanks are usually the ones to place Wards around the map, preferably inside bushes where a hiding Enemy Champion can be spotted.
Assassins, Mages and Marksman tend to use Lenses as their utility item instead, so they can focus more on sniffing out dying prey while scanning around the map every so often to identify enemy-placed Wards too.
Monster Spawn Timing
LOL: Wild Rift’s changes in terms of Neutral monsters and their mechanics have had significant impacts on a team’s overall chances of winning a match. With Dragon buffs now permanently staying until the end of the match, securing these passive abilities becomes another major aspect of team play in Ranked matches too.
The Rift Herald’s introduction in the mid-game also offers another incentive for players to attack the Baron lane, even before Baron Nashor starts spawning later on in during a match. In order for your team (and Jungler) to plan out which buffs to acquire in an order, these specific monster spawn times can definitely help you out immensely:
| MONSTERS | SPAWN TIME (in-game minutes) | RESPAWN TIME (in-game minutes) |
| Common monsters (Gromp, Wolves, Razorbeaks, Krumps) | 0:22 | 1:30 |
| Blue Sentinel | 0:20 | 1:30 |
| Red Brambleback | 0:20 | 1:30 |
| Rift Scuttler | 1:25 | 2:00 |
| Elemental Drake/ Dragon | 4:00 | 4:00 |
| Rift Herald | 6:00 | N/A |
| Baron Nashor | 10:00 | 3:00 |
Now armed with knowledge on when these precious creatures spawn in throughout the game, your team’s coordinated attacks and buff timers will definitely be streamlined much easier while playing in a party. These would become pivotal towards securing those precious Victory Points (VP) to rank up in Top Tier Ranks, later in your LOL: Wild Rift adventures.
- 9.6Total Score
The mobile spin-off of the uber famous League of Legends, it is a must for every MOBA fun out there.
- THE GOOD
- Overall a very good mobile edition of a complex game
- More beginner-friendly than its PC counterpart
- Controls are playable and intuitive
- The player base is known to be much less toxic and insular than the PC version
- Works on weaker hardware devices
- THE BAD
- Controls can at times be unresponsive or have a hard time keeping up

