Introduction
Valheim is the latest open-world survival sandbox game which is continuously being developed by Iron Gate Studios, a Swedish video game developer. Still currently in Early Access, the game has managed to garner worldwide fan acclaim after its impressive showcase of in-game survival mechanics, intuitive combat, and mesmerizing atmospheric landscapes of the fictitious tenth world of Norse mythology, Valheim. With sales sky-rocketing above the 5-million copies mark within the first few months of Early Access, it is evident that Valheim has ticked everything right when it comes to creating a fun and exciting role-playing experience on the PC.
Requirements
Before you start rocking your very own wicked armour set and killer weaponry, you will need to make sure you meet the computer requirements needed to play the game properly first:
| Minimum Requirements | Recommended Requirements |
| OS: Windows 7 or higher (64-bit)
Processor: Quad Core 2.6 GHz (or equivalent) Memory: 8GB RAM GPU: NVIDIA GeForce GTX 950/ AMD Radeon HD 7970 DirectX: Version 11 Storage: 1GB of available space |
OS: Windows 7 or higher (64-bit)
Processor: i5 3GHz/ AMD Ryzen 5 3GHz (or equivalent) Memory: 16GB RAM GPU: NVIDIA GeForce GTX 1060/ AMD Radeon RX580 DirectX: Version 11 Storage: 1GB of available space |
In terms of Linux users, the spec requirements remain similar to their PC counterparts, barring the latest SteamOS + Linux versions available. Now that we’ve got our bearings straight, let’s dive straight into the action.
The World Of Valheim
As a fallen Viking, you are now tasked by the feared yet benevolent Odin to bring order and peace to the forsaken lands of Valheim, a world created for the exiled enemies of the mighty God. A place of in-between, this will be your true test of Norse judgement – slay the dreaded monstrosities scheming against the Gods and be rewarded with a place in Valhalla, or risk eternity in Hel if you fail to do so.
When you start the game, you will be given an option to create a World Seed – randomized order of in-game map landscapes, creature spawns and many more. Depending on how you would want to challenge yourself in Valheim, you have two (2) options to decide here before jumping into the game:
Let the game create a randomized World Seed for you
Find another player’s World Seed to use as your Valheim world (some players may create easier maps, others may opt for a higher difficulty spike)
If you wish to use other players’ World Seeds as your basic world map, you can check out some user-generated World Seeds here, depending on your choice.
Biomes
In Valheim, there are various landscapes and environments for you to scour, each with its own unique ecosystems and architecture to explore and understand. To note, all the Bosses that you will need to slay are located in each of these Biomes respectively, although their specific locations are randomized for you to search for in the game. The Biomes which are available in the game (including those which are still being developed until the game’s full release) are:
Meadows: This is your typical starting area. You will find plenty of low-level monsters here for you to grind skills (Run, Jump, Bow, Axe, etc.). Boss: Eikthyr
Black Forest: Dense forest area populated by menacing creatures, the Black Forest is home to much more dangerous creatures such as Trolls and Greydwarfs. Higher tier materials are also found here, such as Tin Ores and Greydwarf Eyes (loot drop from killing Greydwarfs). Boss: The Elder
Swamp: Dark and cold watery area further in-land, the Swamp is a place where foul creatures lurk deep within sprawling crypts and shallow muddy waters. Much more valuable materials can also be farmed here (Ancient Bark, Amber Pearl, Ruby, etc.), but most will not be available for you to gather until defeating the second Boss, The Elder (requires an essential item drop from its death). Here, character debuffs and conditions such as Wet and Poison become frequent, so you need to be prepared with the necessary items and equipment accordingly. Boss: Bonemass
Mountain: Cold, icy terrain located further from the warmth of the Meadows, the Mountains are the unforgiving place for creatures such as Wolves and Drakes to make their nests and shelter. Certain rare materials are located here, such as Silver Deposits and Obsidian Ore. You will constantly be inflicted with the Freezing ailment here, which saps away your Health gradually. Boss: Moder
Plains: Back to the warmth and breeze under the sun, the Plains are vast and expansive lands which houses beasts such as Deathsquitoes and Loxes. You are free from any negative conditions here, but you will consistently find populations of Fulings (goblin-like creatures) attacking you on sight, so always be wary. There are only a few exclusive materials that can be found here, such as Barley and Black Metal. Boss: Yagluth
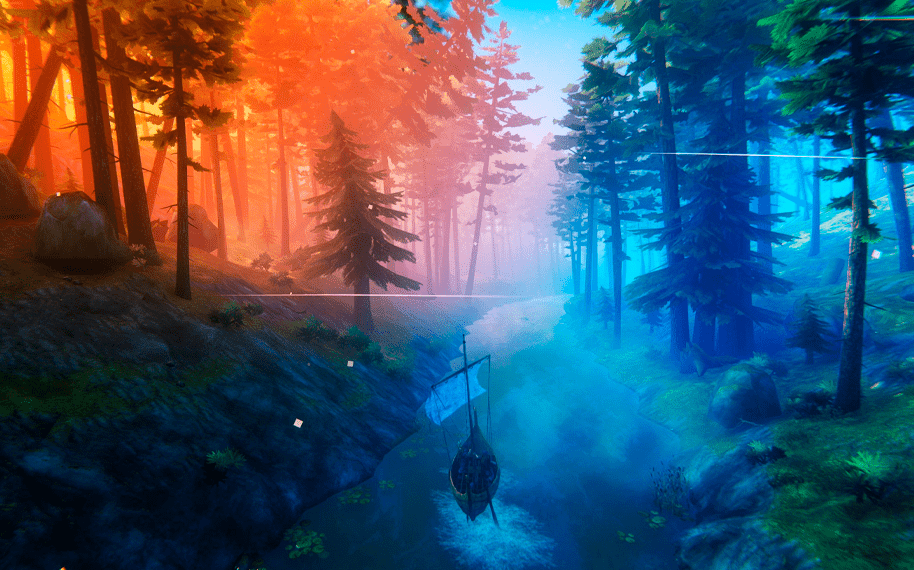
Ocean: The vast uncharted sea surrounding the land is also considered a Biome – the Ocean, home to underwater horrors and ghastly creatures of the deep. Currently (Early Access), there isn’t much that can be done here besides travelling to the other Biomes via Rafts or Longboats, or killing sea creatures like the deadly Sea Serpents to farm their materials. Expect to see another Boss fight here, once the final game is released.
Mistlands: The Mistlands are foreboding areas clouded by chilling mists and hundreds of ensnaring cobwebs. There is currently nothing to do here except familiarizing yourself with the local surroundings (no creature spawn, rare loot, etc.). Content will be added in the near future, including its own Boss, as we move along closer to the game’s final version.
Deep North: Land beyond the Mountains, the Deep North is also a sprawling terrain which suffers from zero-degree temperatures which is dangerous for unprepared explorers to venture into. In Early Access, the Deep North is still void of content, but expect to see more life in this uninviting place later in the future. One Boss will certainly be located here, later on.
Ashlands: The opposite of the Mountains and Deep North, the Ashlands are fiery terrain which will undoubtedly inflict you with certain afflictions such as Heat (not yet confirmed in Early Access). At present, there is not much to do here too, except to explore new surroundings and possibly farm Surtlings for their loot and materials, besides mining Flametal Ores. A Boss will definitely be spawned here in the latter stages of the game’s development. Getting to know the environment will help you prepare yourself tremendously before taking the big leap into surviving Valheim’s treacherous lands.
Survival Basics
In the beginning, Valheim is not as harsh and unforgiving as others might say. Still, the difficulty spike happens much later on, once you’ve reached the third Boss in the Swamp, Bonemass. It is crucial that you understand everything there is to do, as much as you can, before the journey becomes much more perilous moving forward.
New Survivor
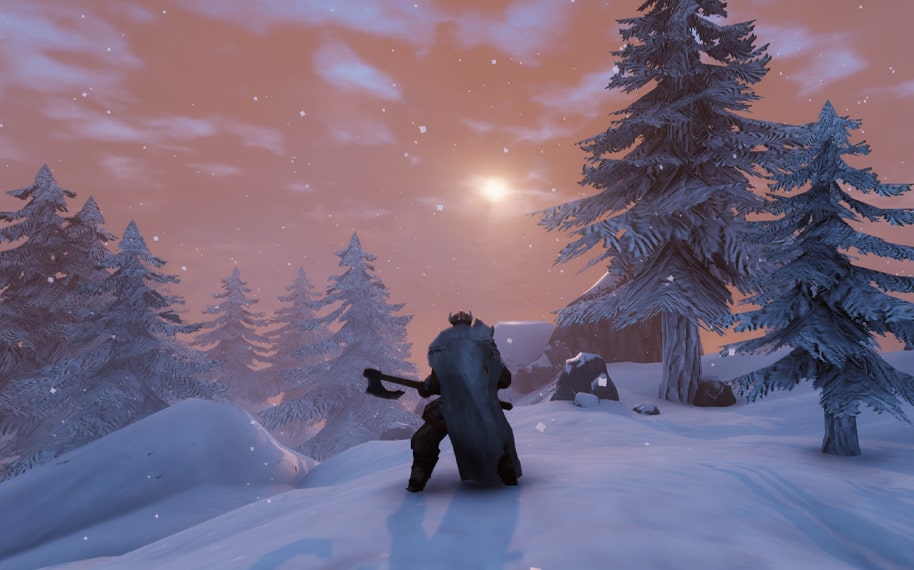
After confirming your character’s creation, you will be transported straight into Valheim via a big raven-like Valkyrie. Here, you will catch a few glimpses of the surrounding area during the flight, so be sure to remember as much detail as you can to have a general idea of how your beginning stages will look like. Once dropped, you will arrive at the Forsaken Altar – an alignment of stone hedges with each of the Boss hedges prepared for you to submit their ‘trophies’ after defeating them (their heads!). Besides occasionally tutorials and advices given to you by a small Raven accompanying you on your travels, you are now essentially free to do anything you want on your own. Here’s what you should be doing as soon as possible:
Gather as much resource as you can
– In Valheim, EVERY resource is important.
– One way or another, even if you’re already far along into the storyline after defeating a few Bosses, crafting another higher grade item or upgrading your current gear will still require you to use basic materials in combination of rarer ones too.
– After you’ve left the Forsaken Altar, your first material priorities should be:
Wood: Punch a few small trees around you (you will not be able to topple larger ones yet without an axe) to collect Wood.
Stone: Walk around the Meadows to collect Stones scattered around the ground, they should be easily spotted as uneven-shaped rocks.
Flint: Flint should not be mistaken for Stone, and these can be found along any nearby shoreline around lakes, streams or even beaches. They are rectangular in shape, and provide a slight glint once you see them.
Food: For survivability, the easiest food that you can gather early on are Berries which provide slight Health regen and increases the maximum Health cap a bit. Meat is another crucial food item that you should start gathering for consumption, with plenty of Deer, Boar and Neck (lizards) roaming around.
– Your character’s starting weight limit should be around 300 kg, so don’t be shy to hoard as much materials as you can (but don’t go over the limit to avoid becoming encumbered).
Craft your basic tools
– A unique feature of the game is that once you collect new materials, you will automatically learn Recipes to craft various items and equipment for your survival.
– After you’ve gathered a few basic materials (around 50 wood and 50 Stones is a good start), start crafting the first tools for you to use:
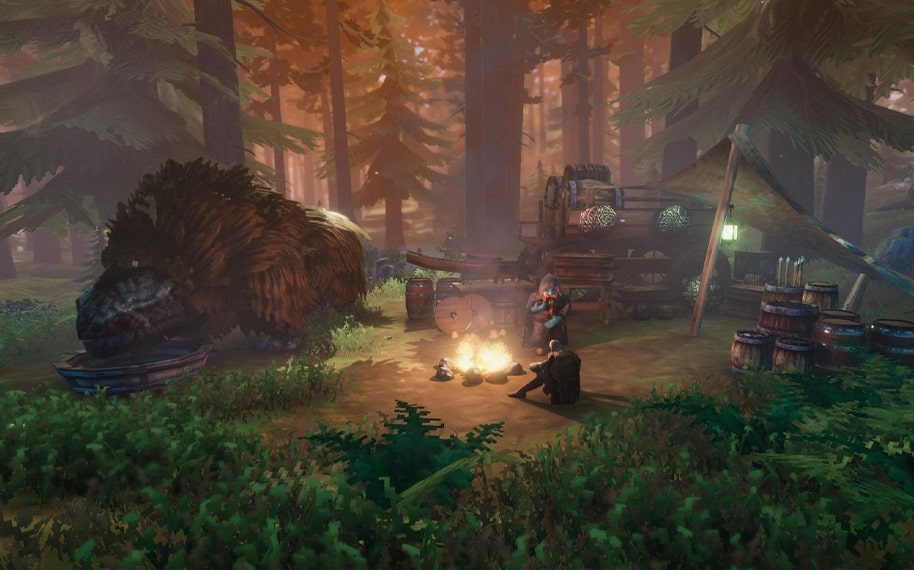
Hammer: This is your essential equipment to build things such as a Campfire, Bed and other furniture.
Axe: An Axe becomes your trusty companion on a daily basis, using it to chop Wood from bigger trees initially too tough for you to break using fists.
Club: Your initial Blunt weapons, Clubs are very dependable as there are not many options of Blunt Damage available to you, early on.
Knife: Your preferred Sneak weapon in the beginning should be a Flint Knife, which provides an astounding 10x backstab damage (axes and clubs only provides 3x backstab damage).
– After crafting all these, you are now much more efficient in gathering resources for your starting home base, while also capable of defending yourself better against the local fauna.
Build a workbench as soon as possible
– Once you are decked out with a few basic tools earlier, start building your first Workbench right away.
– A Workbench unlocks multiple new building recipes besides being the most important equipment required to upgrade existing gears and items too.
– A Workbench only costs 10 Wood for you to build, and you will only require a Hammer to start creating one.
– Note that Workbenches have a wide radial area which will stop any local creature from spawning, and will keep whatever items or materials that you drop inside the radius to remain there for you to pick up later on.
– Once a Workbench is built, you will then need to create a small ‘housing’ around it by building up Walls and a Roof to enclose it, ensuring it is protected from the elements while letting you craft other items as well.
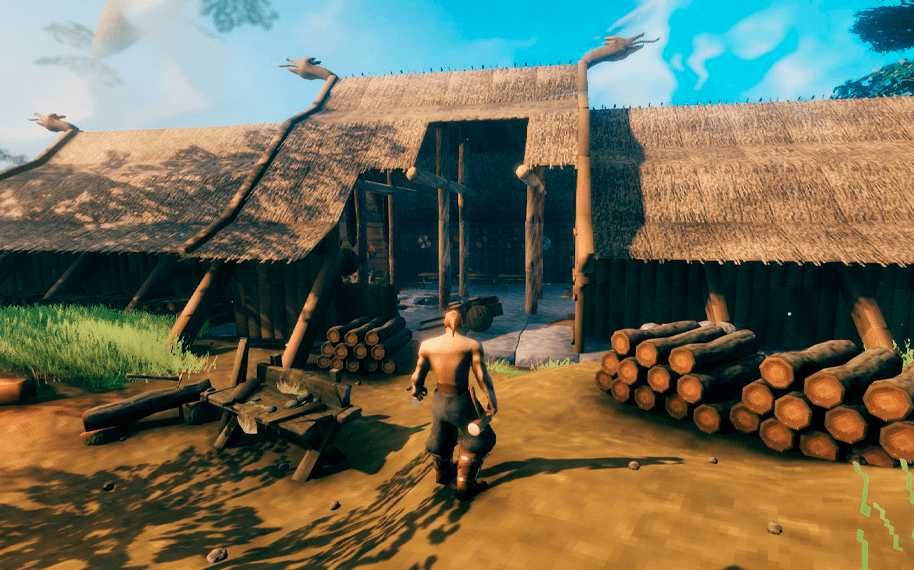
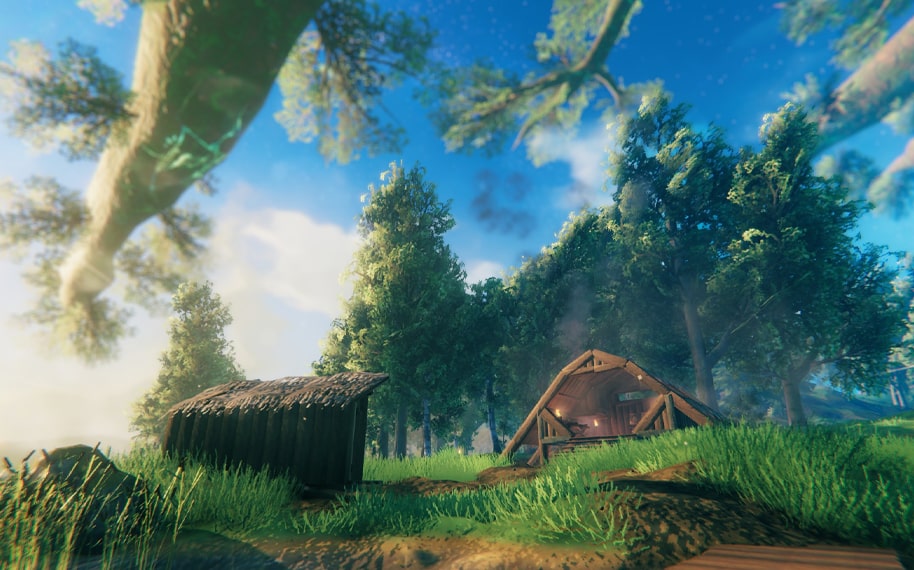
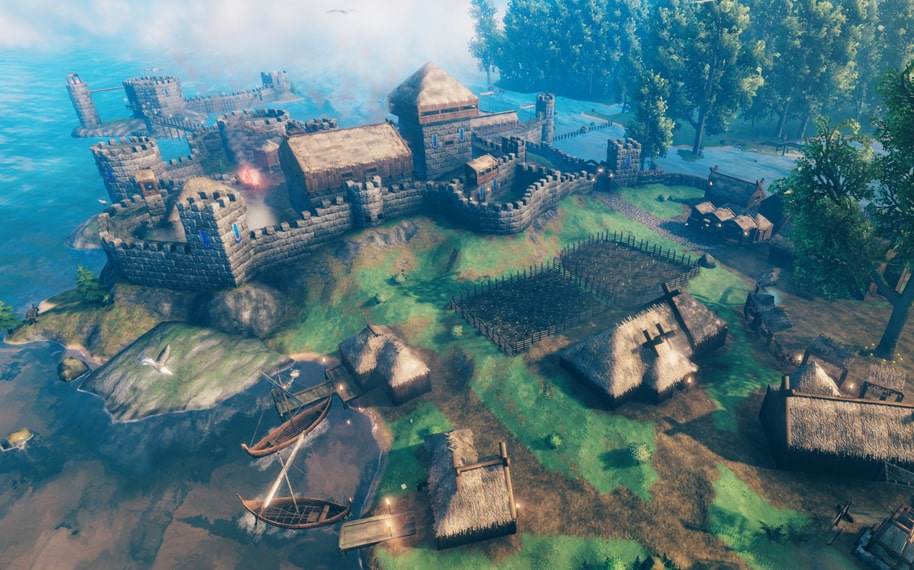
Setting up your first house
– Using the Workbench, you should definitely craft a Hoe in order to level out the surrounding terrain from its uneven shape.
– After flattening the encompassing dirt to accommodate your new prospective home base, build up a few wooden flooring from the Workbench to use as the foundation of your new house.
– Since you are still in the beginning phases of the game, DO NOT build your house too elaborately as there are still so many more building components which are not unlocked yet until later in the story (defeating Bosses, new materials and recipes).
– For now, build a small, comfy settlement which provides these essential aspects first:
Walls: Protect yourself inside the house, from intruders or nature itself. As a start, you can also build those wooden walls as the exterior around your encampment too, ensuring no mobs try to enter into your compound without alerting you first.
Door: Access point for you to enter and leave the house.
Flooring: Wooden tiles should do the trick for now, as you provide a good place to arrange your furniture and equipment.
Roof: Provides shade from the heat of the sun, or drizzling rain.
Cooking Station: A place to grill/ cook your meat (on top of a fireplace) before eating, to provide extra Health and nourishment.
Chimney/ Air vents: This one is not explained to you directly, but leaving some space between the roofs to allow open airways is crucial IF you plan to build your campfire INSIDE your house.
Suffocation is a thing in Valheim, and you do not want to lose essential Health by learning it the hard way.
– There are other things that you can build to make your settlement more complete, such as a Beehive for Honey, but those mentioned above are the essentials which should be prioritized above others.
Map out the surrounding area (Meadows is usually the beginning area)
– Exploration in Valheim is key towards you finding the Bosses scattered throughout the world, but the in-game map will only show you the location of very basic information, like the Forsaken Altar.
– You will need to scout your environment constantly, and mark crucial locations such as abandoned wooden structures and mysterious altars found all over the world.
– Due to lack of guidance in the game, here is how you can mark those special locations on your map:
With the map open, choose one of the five (5) icons available on the bottom-right side of the map.
Double-click on the specific location that you are referring to on the in-game map, and the marker will be set in place accordingly.
You can even name the marker once it is placed.
Left-clicking the marker will create a cross on top of it, in case the resources there have not respawned yet (but you will visit them again at a later time).
Right-clicking the marker will remove it completely, once you deem it is no longer necessary (or is already depleted/ destroyed).
After you’ve done all of these accordingly, you will be more than capable of handling yourself properly before setting off towards your first real test – slaying the formidable Eikthyr.
Master of Weapons and Armour
Still in Early Access, Valheim’s current array of weapons and armours are continuously being expanded upon, to allow more combinations of your choice once it is fully released. However, at present, the catalogues of weapons and armours available are still quite respectable, with each of them being categorized under different tiers depending on the materials required and level of effectiveness against each respective Boss. Identifying the current tier of gear that you are equipping can help you gauge how effective you are at going up against each of the different Bosses in the game.
Weapons
There are various types of weapons available in the game, but each can be classified as:
One-handed weapons (offensive)
Two-handed weapons (offensive)
Bows (offensive)
Shields (defensive)
Basically, one-handed weapons allow you to equip a Shield or Torch while also providing lower movement speed penalties (dual-wielding weapons is not possible as of yet). Two-handed weapons provide the most damage and Area-of-Effect (AOE) destruction to enemies, but will limit your mobility tremendously. It is advisable to cycle between the weapons constantly to suit the need of combat. If melee combat is far too risky for you during certain circumstances, you can also use Bows to attack from afar. Each of these weapons provide different levels of effectiveness, with some offering Pierce and Slash Damage while others create Blunt Damage instead. Knowing which to use depending on the situation is the difference between a new player of the game and a veteran with countless hours of in-game time clocked.
Here is a general ascending order of the weapon tiers that you can find in Valheim:
Melee weapons
Stone
Flint
Bronze
Iron
Silver
Blackmetal
Bows
Crude
Finewood
Huntsman
There are also rare types of weapon classes that you can find in the game, such as Abyssal Knives and exclusively-named weapons like the Draugr Fang. These unique weapons are usually placed around the top tier weapon ranks (between Iron and Blackmetal), so you should definitely save them if found throughout your adventures, or even craft one if you have the necessary tools and materials. Different types of arrowheads can also provide significant damage improvements between grades too.
If you are more of a bow and arrow user, here are the current Arrows that you can craft in Valheim (in ascending damage power):
Wooden arrows
Flinthead arrows
Bronze arrows
Fire arrows
Ironhead arrows
Obsidian arrows
Needle arrows
Silver arrows
Poison arrows
Frost arrows
Now you are much more knowledgeable of which weapon you will likely want to strive for, in the game!
Armour
Survivability against enemy hits and attacks is also very important for all your playthroughs in Valheim. In the beginning, you can easily tank damages from creatures such as Boars and Greylings. As you travel further into the world, you will come across even more dangerous creatures roaming around the lands (and water), capable of killing you within a matter of seconds. Some armour can even help you to withstand nature too, like Wolf Capes which give you Frost Protection from freezing.
Similarly like weapons, there are currently not many options of armour to choose from, but each tier does provide improvements from one another. In general, the ascending order of armour tiers can be simplified as:
Capes
Deer hide
Troll hide
Wolf fur
Lox hide
Linen
Armour pieces
Rag
Leather
Troll leather
Bronze
Iron
Wolf
Padded
Some armour pieces like the Drake Helmet are unique to itself, and there is a possibility that more varieties will be added into the game closer to its official release.
Exploiting Monster Weaknesses
There are already a variety of local fauna inhabiting the world of Valheim, both passive and aggressive to the player. In order to survive, you will have to kill them to gather Meat and other precious materials for use. Passive creatures like Deer, Gulls and Fish provide sustenance for you to eat, while aggressive mobs such as Skeletons and Fulings drop crucial loot for you to craft weapons and armour.
If you are having trouble defeating certain types of enemies along your travels, it’s always best to keep a general idea in mind about what their specific weaknesses might be. Here are some guidelines for you to follow:
Local Creatures
Meadows: Most creatures are susceptible to Fire damage, and some of them (Neck, Greyling, etc.) are resistant to Poison.
Black Forest: A combination of Fire, Blunt and Piercing weapons works wonders against dangerous foes such as Trolls, Skeletons and Greydwarfs, but Ghosts are the only creatures here that are very weak to Spirit Damage.
Swamp: Here, you will need to mostly opt for to Blunt, Frost or Lightning weapons if available. Most creatures here are resistant to Slash, Pierce and Fire attacks, while some are even immune to Poison Damage.
Mountains: The cold temperatures here provide incentives to use Fire, Pierce and Slash weapons to damage the local inhabitants of the terrain.
Plains: There are currently no specific weapon preferences here, but opting for Fire Damage consistently could provide slight advantages against the surrounding local creatures.
Mistlands, North End and Ashlands are still under development, but creature details will undoubtedly be shared once more information is released in the future.
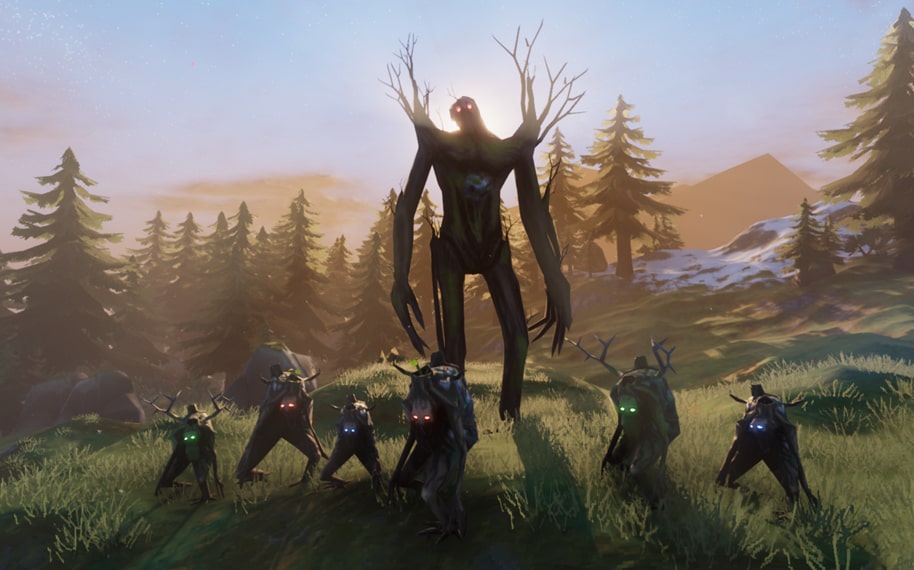
Bosses
As of Early Access, there are only five (5) out of the nine (9) proposed Bosses which are currently located around Valheim. Each of these horrifying menaces is capable of challenging most inexperienced players, and can end you very quickly if you make the slightest mistakes. As a basic advice, always use the best gear and weapons available to you at the time, before each fight. Besides that, make sure you are fully rested to attain the necessary buff, and eat any optimal cooked food that you can make.
If you are looking for specifics though, you might be interested to refer below:
| Boss/ Details | Weaknesses | Resistances | General strategy |
| Eikthyr | N/A | N/A | – Hide behind the surrounding pillars when Eikthyr launches its devastating lightning attacks.
– Shields can be used to block incoming attacks (physical and lightning). – Whittle its HP down gradually through hit-and-run tactics. |
| The Elder | Fire | N/A | – The Elder is capable of periodically summoning roots around you to attack, so you need to constantly be on the move while attacking him in between his attacks.
– Before initiating the fight, you can create a number of Campfires around the altar to burn The Elder slowly as it walks around the area. – You can also dig the ground around the altar, making it possible to avoid all of its attacks by safely hiding underground. |
| Bonemass | Blunt, Frost | Slash, Fire, Pierce | – Bonemass is a very slow but dangerous adversary, with its physical attacks capable of taking chunks of your Health instantly, while also spewing Poison at you.
– Poison Resistance Meads are a MUST in this fight. – You need to be mobile throughout this fight, with close-combat the best method of defeating the creature in a timely manner. – A Mace or Broad Hammer should be your preferred weapons here, as Bonemass seems to be impervious to other forms of damage. – Focus on defeating mobs which are summoned by it first, before attacking it again. |
| Moder | Fire | Frost, Spirit | – Your most damaging Bow and Arrows are needed here.
– You can prepare certain wooden walls or structures to use as obstructions during Moder’s airborne attacks (build them before the fight). – Moder is lethal up close too, but you can still use a Shield to parry or mitigate most of its physical damages. – Moder is much more vulnerable while grounded, but be wary of its swipes and Frost Breaths (you will see visual cues). – Don’t forget to bring Frost Resistance Meads too, if your armour is not fit for the cold. |
| Yagluth | N/A | Fire, Pierce, Poison | – Yagluth is a lumbering monstrosity, but its attacks are very easy to read and prepare for.
– Use the surrounding altars to your advantage during its attacks, as Yagluth’s offensives can range from showering meteors to flames from its mouth. – ALWAYS be on the move, as it can easily manoeuvre around your hiding spots to spew fire at you. – Use Fire Resistance Barley Wine for this fight! – Although Frost Arrows and Silver Arrows may be the best bet to attack from range, melee combat is still the most effective way to kill Yagluth fairly quickly. |
As a final note before prepping yourself against these horrors, always make sure that you enable Eikthyr’s, Bonemass’s, or Yagluth’s (for future Bosses) Forsaken Powers to provide slight advantages in the prospective fights.
Partying Up
Although playing Valheim solo is very much possible, enjoying the game with friends is definitely the ultimate experience when it comes to exploring the vast unknowns of the game’s procedurally-generated world. Valheim is capable of supporting up to 10 concurrent players at the same time, allowing you to plan out various party raids or even seafaring journeys across the vast ocean. If you are unaware about how to play cooperatively with others, here are the general methods required:
Host
Create a World Seed.
On the World list, choose your created World Seed and click on ‘Start Server’ (allowing you to host a dedicated private server).
Alternatively, if you have already created a World instance before, choose that one and click ‘Start Server’.
Create a password (optional).
On Steam, invite your friends to join the game.
Friend/ Party
Accept invite to launch Valheim.
On the ‘Select World’ list, click on the ‘Start Server’ option too (allowing the person’s game to be connected to the game’s servers).
Once done, click on the ‘Join Game’ tab and search for the host’s created World instance.
Join the game, and insert the necessary password if set previously.
Joining other peoples’ sessions are a great way of gaining personal experience and knowledge about the game without risking too much of your own items and equipment.
However, caution needs to be advised if you are doing this with random players online though, as some players may disrupt the overall gameplay experience if they do not follow your in-game rules and mutual consent within the World.
General Tips and Tricks
After covering most of the basics of the game, here is where you can find out some advanced setups to help elevate your survival chances in Valheim.
Do everything (literally!)
– The Skill System in Valheim works almost similarly to other Role-Playing Games (RPG) in the market today, levelling each skill up by doing them repeatedly.
– Let’s say you are looking to improve your running speed while decreasing its stamina usage, then consistently running around the Meadows early on can absolutely increase your Running Skill to Level 10 in no time at all!
– You can become any type of Valheim player as you wish by just doing the things that you love to do in the game, getting better at it as the skills continue to level up reasonably quickly.
Holster those Weapons
– By putting away your weapons and tools, you are not only leaving your hands free but also lessening the burden on your character, improving his/ her overall run and movement speed.
– You can traverse the land and explore your surroundings much quicker by doing this, only equipping your equipment when specifically needed (gathering, farming, attacking, etc.).
– You can also use this habit to get away from pursuing monsters, if retreating is the best option at the time.
Be careful when chopping trees!
– Valheim utilizes a respectably advanced physics engine, which is very capable of simulating object fall damage and compute nearly accurate object collisions.
– This also creates surprising moments where falling trees could literally kill you if you are not careful, which is definitely unheard of in other video games out there!
– However, this also creates certain exploits which you can use to your advantage, such as:
Finish chopping down a tree to let it come crashing down on a nearby mob of enemies (be certain of the falling trajectory).
Destroy other trees simultaneously to gather their materials much faster, by letting your chopped tree fall down onto them.
Falling trees can also help you acquire certain higher grade materials in the beginning stages of the game by destroying an adjacent Birch tree, which can only be chopped down using a Bronze Axe or better (acquired much later on after defeating the first Boss).
Fence off those Campfires
– Building a Campfire is an essential mechanic in Valheim, but the game fails to tell you that you can accidentally burn yourself if you misjudge your distance from the flames (or even stepping on it!).
– There are multiple ways to avoid this, with some popular ones being:
Creating a border around the campfire, possibly using chests.
Digging up a hole to accommodate the Campfire into the ground.
Installing visual cues like Rugs for you to stand on, distancing yourself safely from the fires.
– There are endless building possibilities in Valheim, so be creative!
Taming pets
– Right now, the only animals that you can tame in the game are:
Boars
Wolves
Loxes
– Capturing and befriending these creatures may provide you with easy access to abundant supplies of Meat and specific materials by letting them mate (two Boars, two Wolves, etc.).
– Loxes are currently unable to reproduce, but hopefully this will be rectified later on throughout the game’s development.
– Taming these wild animals is not easy though, as you will need to trap them into an enclosure and feed them constantly to increase their happiness levels (yellow hearts the first time around, hovering the mouse over to check its happiness again later on).
Gradually improve and upgrade your house
– As you progress within the game, better materials and building items will be unlocked as you beat tougher Bosses in different Biomes.
– You should not focus on creating the best home base yet if you are still stuck with Eikthyr, as you will just waste those precious materials and time in the beginning.
– After progressing further into the Storyline, you will unlock better equipment and building items which can then be used to gradually setup your ideal house, farm or castle, depending on your imagination.
Exploit all your advantages before Boss fights
– These should already be common practice, but always get a good night’s sleep, eat the best food there is, gear up with the strongest weapon and armour available to you, and use any one of the Forsaken Powers that you have unlocked earlier if necessary.
– One aspect which is not quite apparent is that you can manipulate the upcoming battle by exploiting the surrounding area of the Boss altar too.
– If you wish to setup walls, ladders and platforms around tall trees, dig trenches to trap the Bosses, or hide inside a small crevice of your own making, you can freely do so without even prompting the Boss fight just yet!
– Preparation is crucial towards winning these extremely long battles, so spending a few in-game days to create a fortress in front of the respective altar wouldn’t even hurt you one bit.
Water is your friend (mostly).
– So far, NONE of the land creatures are able to swim into deep water.
– If you find yourself caught off-guard against Trolls or even Bosses, try luring them towards the edge of the shorelines, and jump into the water.
– Wait for them to lose their aggro, climb back up to land and continue shooting arrows at them from a safe distance.
– Rinse and repeat, get rewarded!
Workbenches everywhere!
– Workbenches provide a small radial area which stops creatures from spawning.
– Although it is not ideal to have too many Workbenches scattered around the map (can be destroyed by random mobs wandering into the area), you can still do this at specific locations of interest if you want to farm or grind materials safely.
– Speaking of which…
Build a cart for long-distance farming/ transport
– If you already have some Workbenches built at key locations around the map, then your next step should definitely be crafting Carts to easily transport your new gathered materials and items across the map.
– Your character is limited by the weight cap set within the game, but the cart offers up to eighteen (18) different slots for items to be stacked and stored, alleviating the weight factor altogether (no maximum weight limit on carts).
Prioritize elemental effects
– It goes without saying that elemental damage supplements basic physical damage much better against various types of creatures in the game.
– Every creature in the game has a certain weakness and resistance attribute attached to it, so you should definitely diversify your offensive playstyles with Fire Arrows, Frost Arrows or Poison Arrows too.
– It certainly becomes a chore to gather all the required materials and components to craft them during important moments, so that is why gathering materials as often as you can during your journeys builds up those stacks of components back at home when you need to use them the most.
- 9.8Total Score
It is only available in early-access for now, but it has already garnered praise from multiple sides. So buckle up and prove yourself to be fit for the halls of Valhalla!
- THE GOOD
- Excellent art and music
- Immersive atmosphere with endless potential stories
- Very refined, even though it is only an early-access
- It is already one of the most played games on Steam and the reviews are stellar
- THE BAD
- It is an early-access, so it is not complete yet